Use GoReleaser With Azure DevOps
In this blog article, I want to show how to use GoReleaser in Azure DevOps.
In this blog article, I want to show how to use GoReleaser in Azure DevOps.
But why? Are not everyone using GitHub?
Exactly, not everyone is using GitHub. Actually, there are many companies who use the Azure Cloud with Azure DevOps.
What is Azure DevOps?
Azure DevOps provides developer services for allowing teams to plan work, collaborate on code development, and build and deploy applications.
Azure DevOps provides integrated features that you can access through your web browser or IDE client. You can use one or more of the following standalone services based on your business needs:
- Azure Repos provides Git repositories.
- Azure Pipelines provides build and release services to support continuous integration and delivery of your applications.
- Azure Boards delivers a suite of Agile tools to support planning and tracking work, code defects, and issues using Kanban and Scrum methods.
- Azure Test Plans provides several tools to test your apps, including manual/exploratory testing and continuous testing.
- Azure Artifacts allows teams to share packages such as Maven, npm, NuGet, and more from public and private sources and integrate package sharing into your pipelines.
Install GoReleaser Via The Marketplace
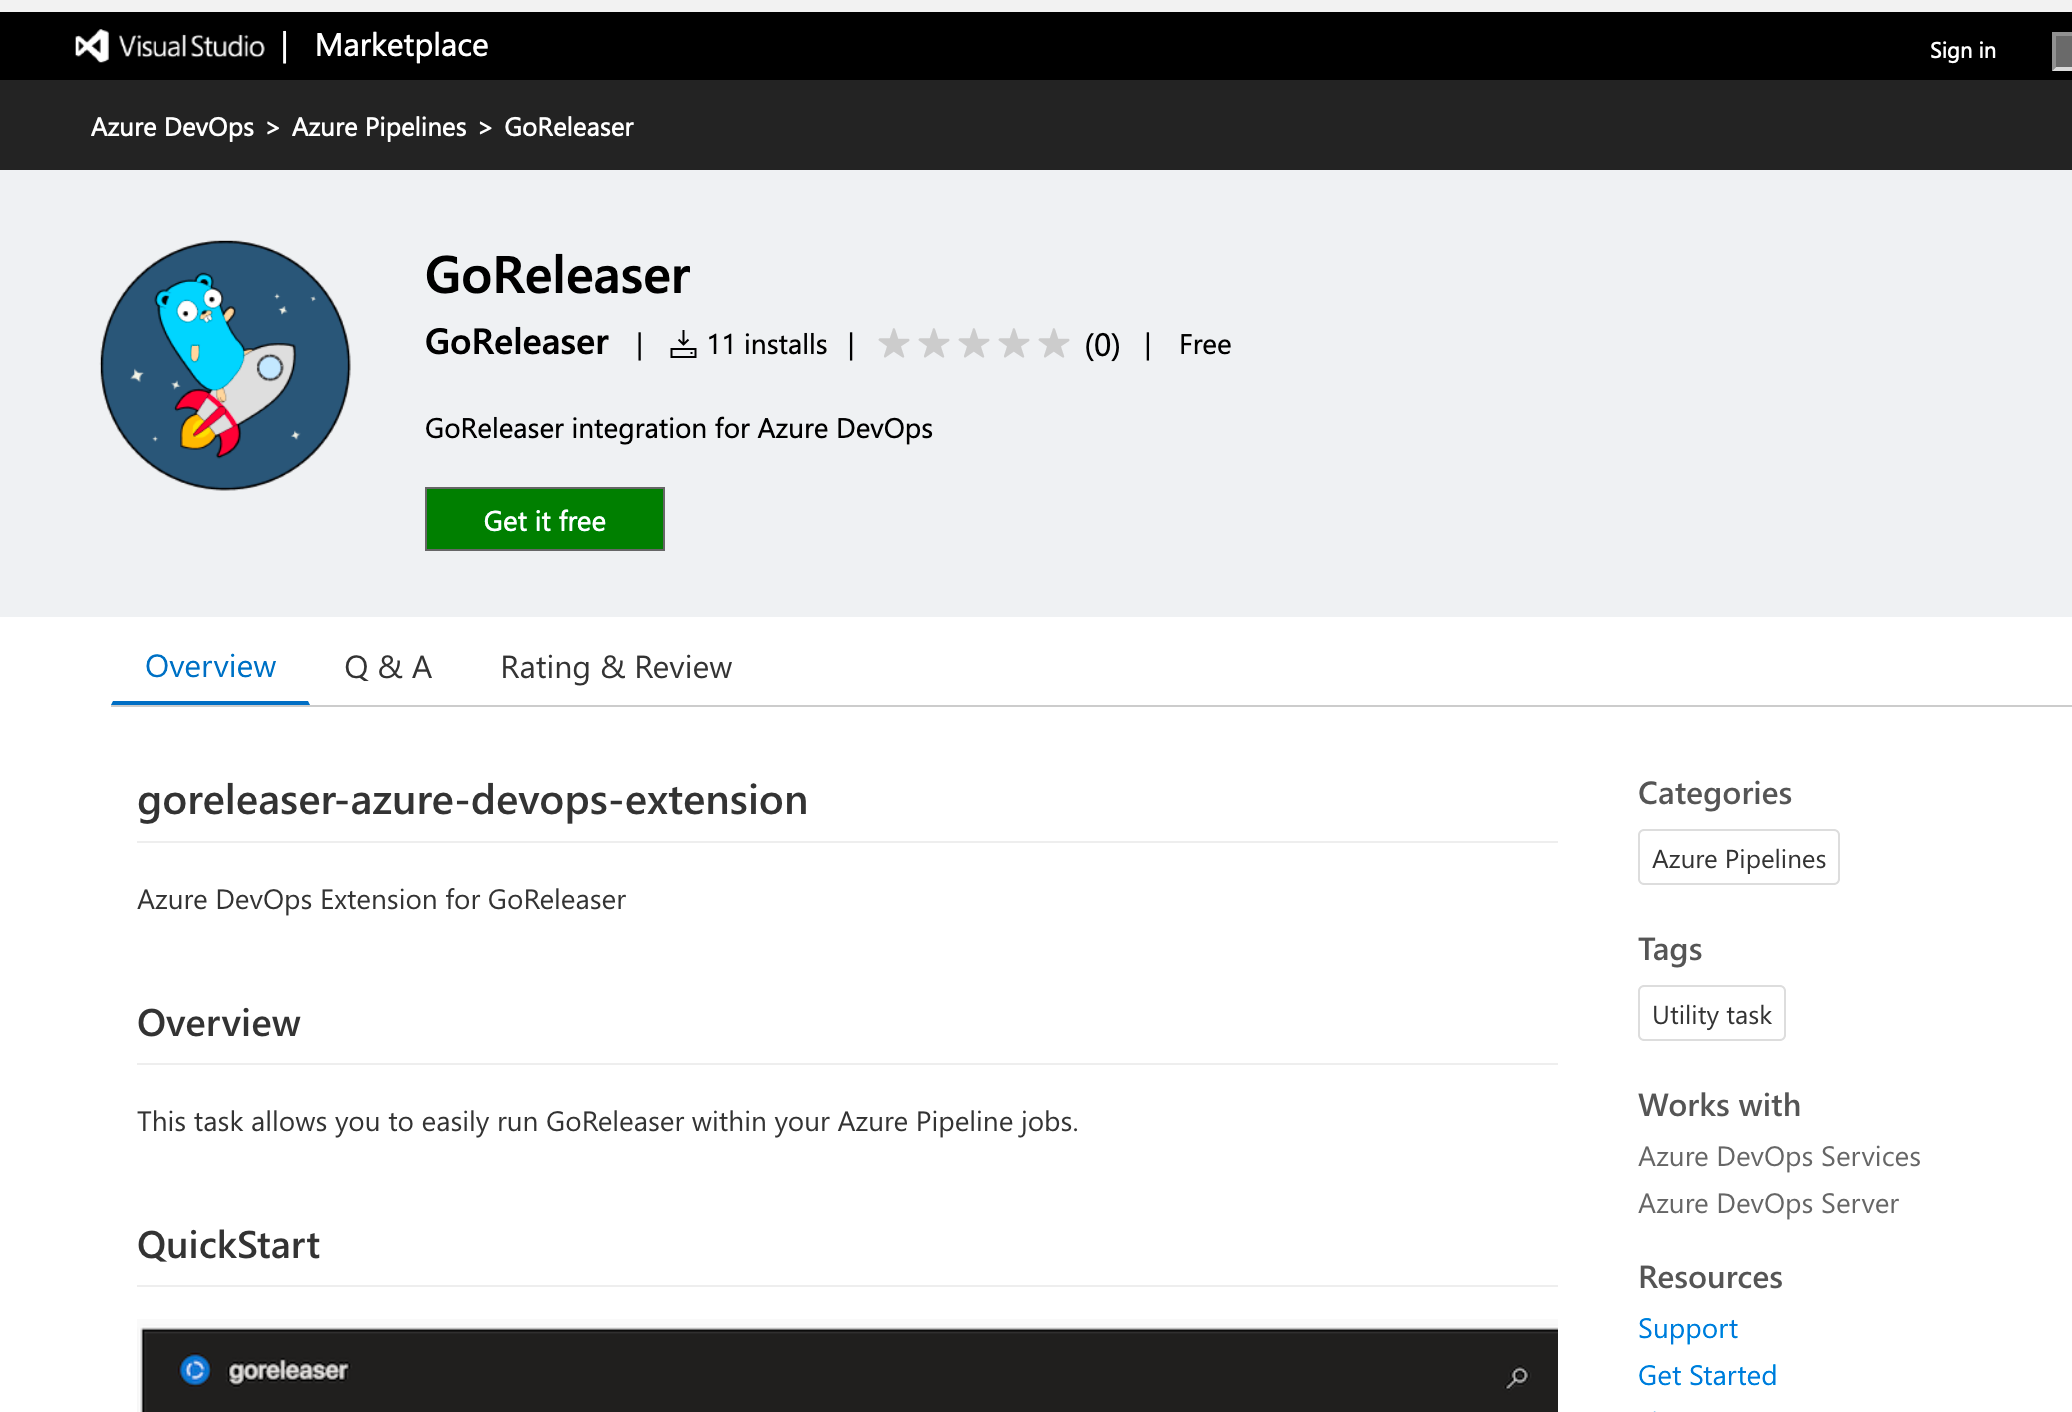
GoReleaser offers a Plugin via the Marketplace. The installation itself is done via some clicks in the UI and you are ready to start!
In your pipeline editor you can lookup the task:
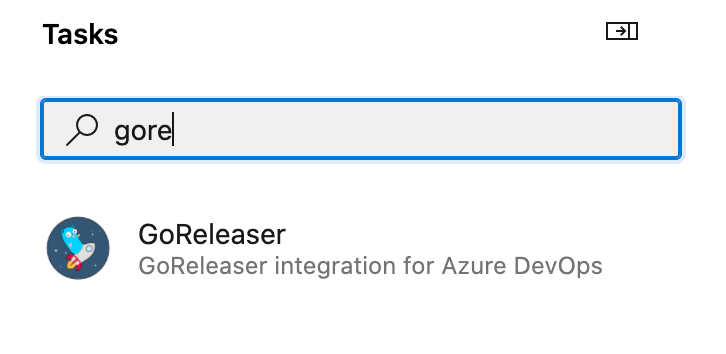
And quickly change the default settings to fit with your use case! For example set a specific version or execute certain GoReleaser commands.
See the official docs for more details https://github.com/goreleaser/goreleaser-azure-devops-extension

Finally The Demo!
package main

import (
	"fmt"
)

var (
	version = "0.0.1"
	commit  = "none"
	date    = "none"
	builtBy = "none"
)

func main() {
	fmt.Println("Version:\t", version)
	fmt.Println("Commit:\t\t", commit)
	fmt.Println("Date:\t\t", date)
	fmt.Println("Built by:\t", builtBy)
}
Before we head over to the configure the pipeline, let us create the
.goreleaser.yaml
# This is an example .goreleaser.yml file with some sensible defaults.
# Make sure to check the documentation at https://goreleaser.com
before:
  hooks:
    # You may remove this if you don't use go modules.
    - go mod tidy
builds:
  - env:
      - CGO_ENABLED=0
    goarch:
      - amd64
      - arm64
    goos:
      - linux
      - darwin

project_name: goreleaser-ado

checksum:
  name_template: "checksums.txt"

snapshot:
  name_template: "{{ incpatch .Version }}-next"

source:
  enabled: true

release:
  disable: true

sboms:
  - artifacts: archive
  - id: source
    artifacts: source

signs:
  - cmd: cosign
    certificate: "${artifact}.pem"
    args:
      - sign-blob
      - "-key=cosign.key"
      - "--output-certificate=${certificate}"
      - "--output-signature=${signature}"
      - "${artifact}"
    artifacts: checksum
    output: true
    stdin: "{{ .Env.COSIGN_PASSWORD }}"

docker_signs:
  - cmd: cosign
    artifacts: images
    output: true
    args:
      - "sign"
      - "-key=cosign.key"
      - "${artifact}"
    stdin: "{{ .Env.COSIGN_PASSWORD }}"

dockers:
  - image_templates: ["dirien/{{ .ProjectName }}:{{ .Version }}-amd64"]
    goarch: amd64
    dockerfile: Dockerfile
    use: buildx
    build_flag_templates:
      - --platform=linux/amd64
  - image_templates: ["dirien/{{ .ProjectName }}:{{ .Version }}-arm64"]
    goarch: arm64
    dockerfile: Dockerfile
    use: buildx
    build_flag_templates:
      - --platform=linux/arm64/v8

docker_manifests:
  - name_template: "dirien/{{ .ProjectName }}:{{ .Version }}"
    image_templates:
      - "dirien/{{ .ProjectName }}:{{ .Version }}-amd64"
      - "dirien/{{ .ProjectName }}:{{ .Version }}-arm64"
  - name_template: "dirien/{{ .ProjectName }}:latest"
    image_templates:
      - "dirien/{{ .ProjectName }}:{{ .Version }}-amd64"
      - "dirien/{{ .ProjectName }}:{{ .Version }}-arm64"
Here, we going to create linux and darwin binary, the corresponding container, create the SBoM with syft and sign everything via cosign.
Here is one first important steps: you need to disable the release step in GoReleaser. Azure DevOps does not work the same way as GitHub what releases concerns. We handle the upload of the artifacts differently.
If you need more infos, for the different settings and possibilities inside GoReleaser, head over to the official documentation https://goreleaser.com/intro/
Service
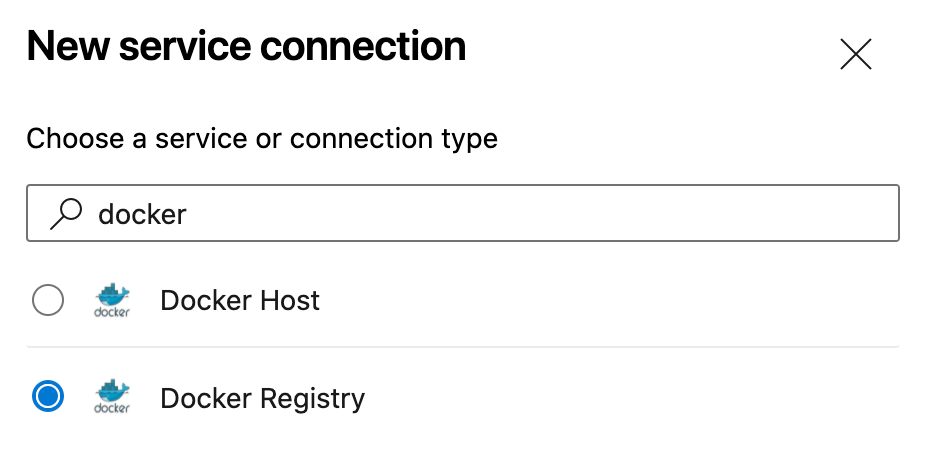
Connection in Azure DevOps As we going to upload the image to Docker Hub, we need to create in Azure Devops the Service Connection.
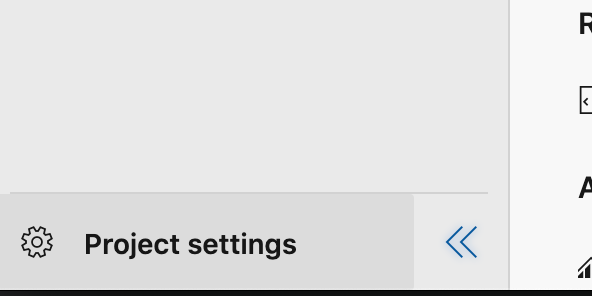
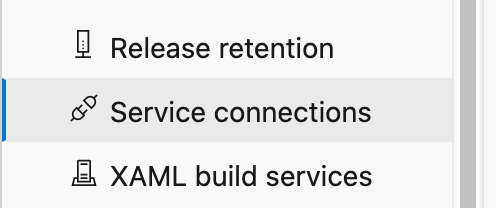
Go to Project Settings and click Service connections:
Choose Docker Registry:
In the detail view, select **Docker Hub **and then enter your details, like
Docker ID, Docker Password and the Service Connection Name:
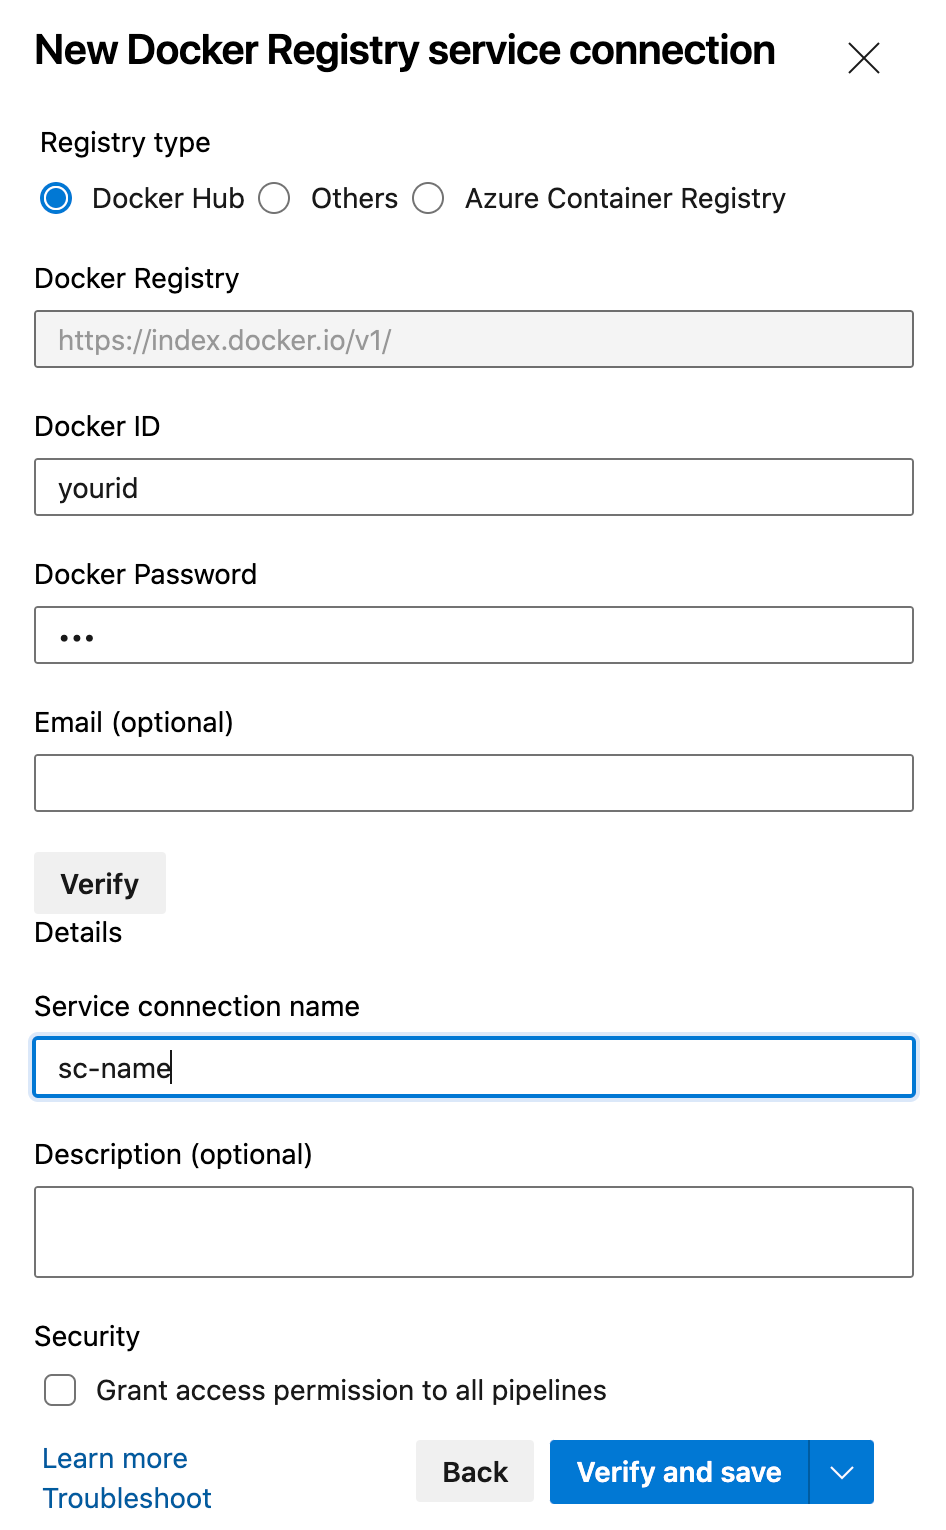
Click Verify and save, we will come back to the service connection in our Pipeline code.
The Azure Pipeline File
Now starts the fun part, the creation of the actual Azure Pipeline. If you are completely new to Azure DevOps pipeline, I highly suggest to checkout the docs from Microsoft.
In our example, we going to write the pipeline only as code (there is a deprecated UI only option too! But meh!).
Azure Pipeline are written in yaml.
# Starter pipeline
# Start with a minimal pipeline that you can customize to build and deploy your code.
# Add steps that build, run tests, deploy, and more:
# https://aka.ms/yaml
pr:
branches:
include:
- main
trigger:
tags:
include:
- "*"
branches:
include:
- "*"
jobs:
- job: build
pool:
vmImage: ubuntu-latest
steps:
- task: GoTool@0
displayName: "Install Go"
inputs:
version: "1.17"
- task: CmdLine@2
displayName: "Build and Test"
inputs:
script: |
go mod tidy
go build .
- job: release
dependsOn: build
displayName: Release via GoReleaser
condition: and(succeeded(), startsWith(variables['Build.SourceBranch'], 'refs/tags/'))
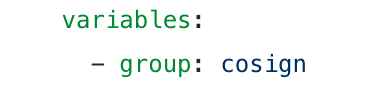
variables:
- group: cosign
pool:
vmImage: ubuntu-latest
steps:
- task: GoTool@0
displayName: "Install Go"
inputs:
version: "1.17"
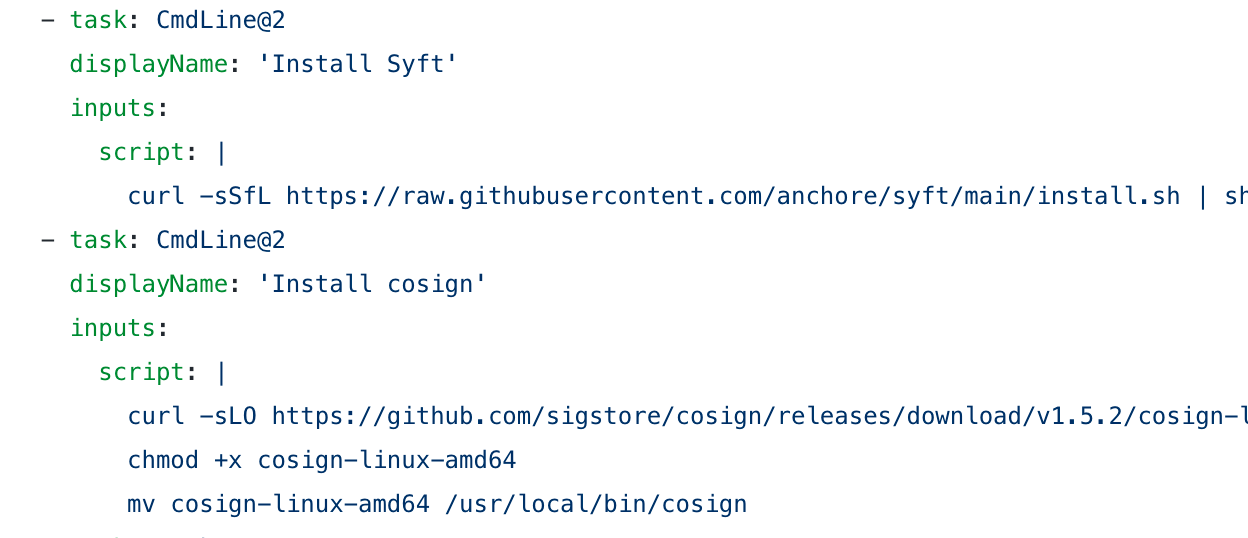
- task: CmdLine@2
displayName: "Install Syft"
inputs:
script: |
curl -sSfL https://raw.githubusercontent.com/anchore/syft/main/install.sh | sh -s -- -b /usr/local/bin
- task: CmdLine@2
displayName: "Install cosign"
inputs:
script: |
curl -sLO https://github.com/sigstore/cosign/releases/download/v1.5.2/cosign-linux-amd64
chmod +x cosign-linux-amd64
mv cosign-linux-amd64 /usr/local/bin/cosign
- task: Docker@2
inputs:
containerRegistry: "dirien-docker-hub"
command: "login"
addPipelineData: false
addBaseImageData: false
- task: goreleaser@0
inputs:
version: "latest"
distribution: "goreleaser"
args: "release --rm-dist"
- task: CopyFiles@2
displayName: "Copy GoReleaser dist folder to ArtifactStagingDirectory"
inputs:
Contents: |
dist/*.tar.gz
dist/*.zip
dist/*.txt
dist/*.sbom
dist/*.sig
cosign.pub
TargetFolder: "$(Build.ArtifactStagingDirectory)"
CleanTargetFolder: true
OverWrite: true
flattenFolders: true
- task: PublishBuildArtifacts@1
displayName: "Publish GoReleaser release artifacts"
inputs:
ArtifactName: "GoReleaser release"The pipeline consist of two different jobs parts:
- the build job, run every time something changes on any branch or when a pull request gets created. Here we can run our tests, linting, SAST to get quickly feedback.
- the release job, will run only when a git tag gets created (see the condition tag under the job tag). Creating a git tag is part of the release process. Similar as we do in the GitHub Flow.
During the release job, we download Anchore syft and cosign as we going to need them during the goreleaser task. Currently there is no native task for this in Azure DevOps. We just use the CmdLine task and curl the binaries.
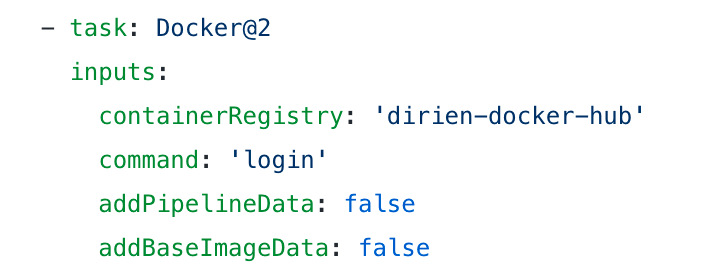
It is also important to log into your Docker Hub account, via the Service Connection we created earlier. The Docker task takes care of the actual login.
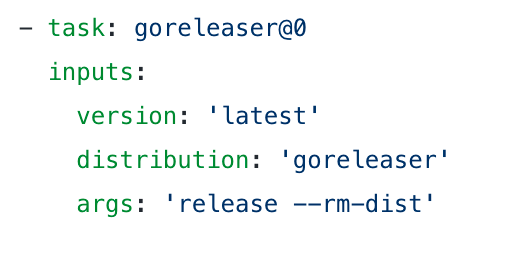
Now we can call our GoReleaser task.
Azure Pipeline Secret Library
For cosign, I use a password, I stored in the Azure Pipeline Library as secret variable.
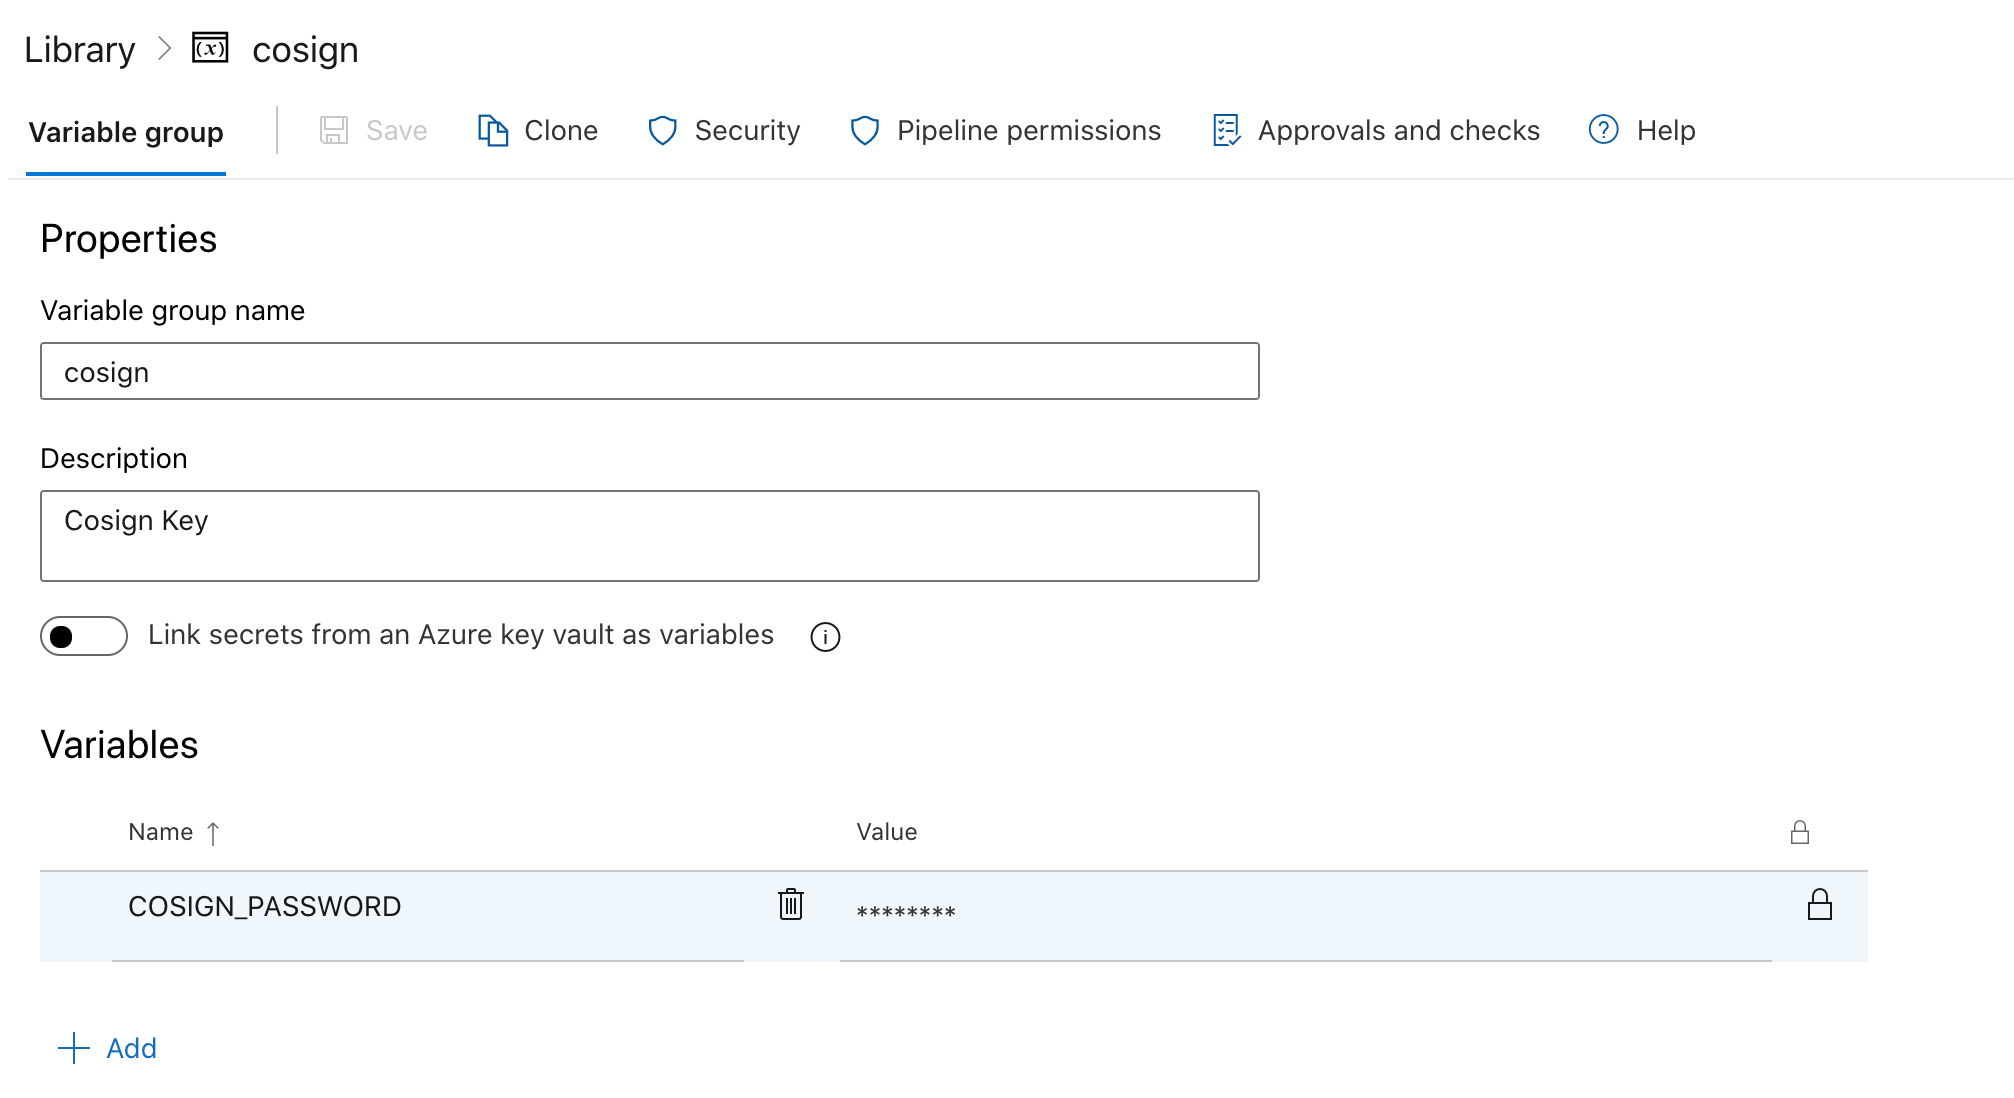
In my pipeline code, I will pass this value as environment variable via the variables tag.
In this demo, I am going to publish the release artifacts as build artifacts.
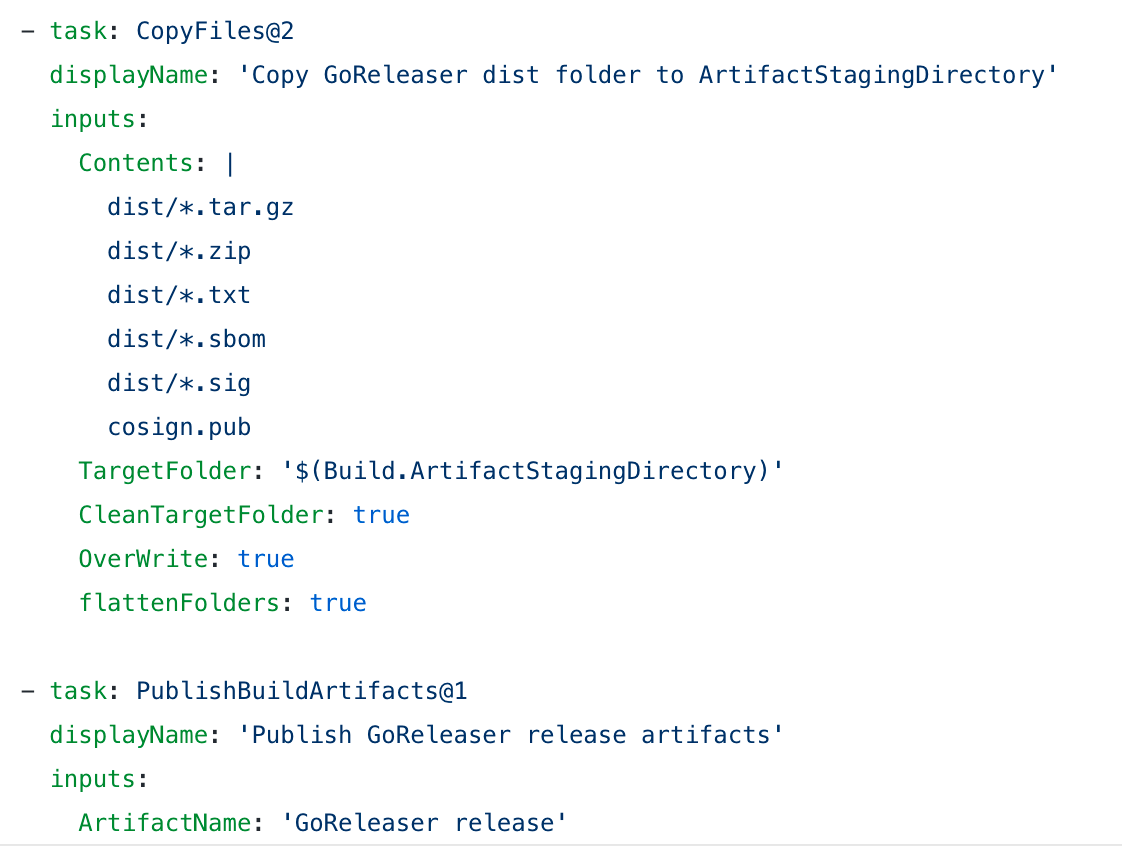
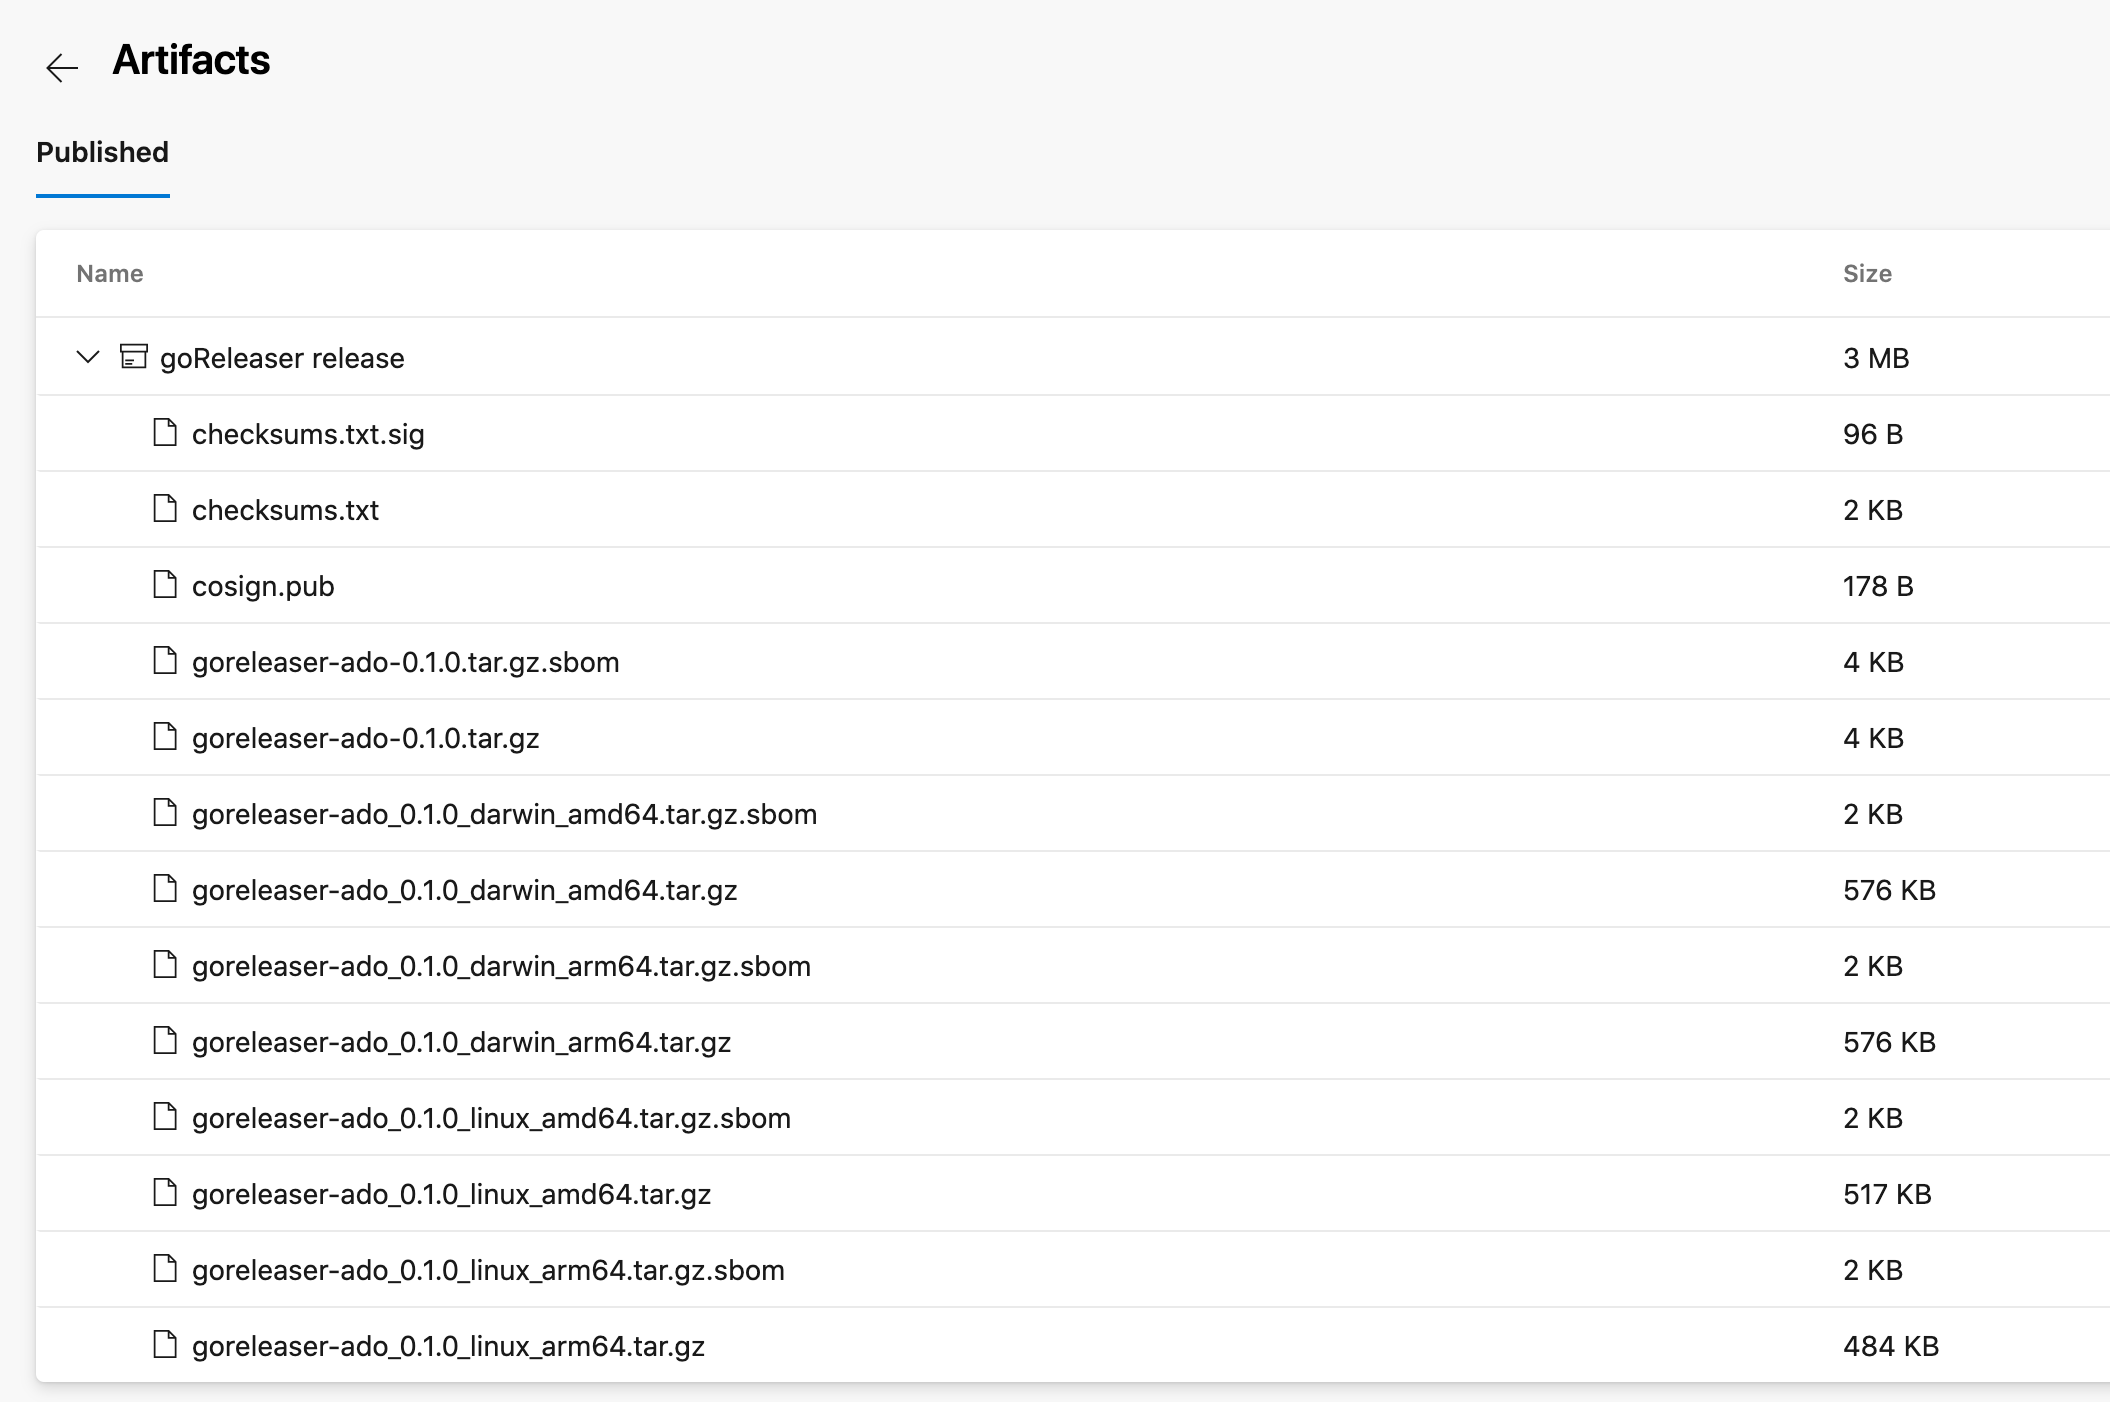
The task CopyFiles collects some files from the dist folder and the cosign public key and PublishBuildArtifacts publish them. You will find the artifacts on the pipeline detail
Of course, you can use other targets too, like a cloud native storage.
You can check out the How to use GoReleaser with Cloud Native Storage post for more details on this subject
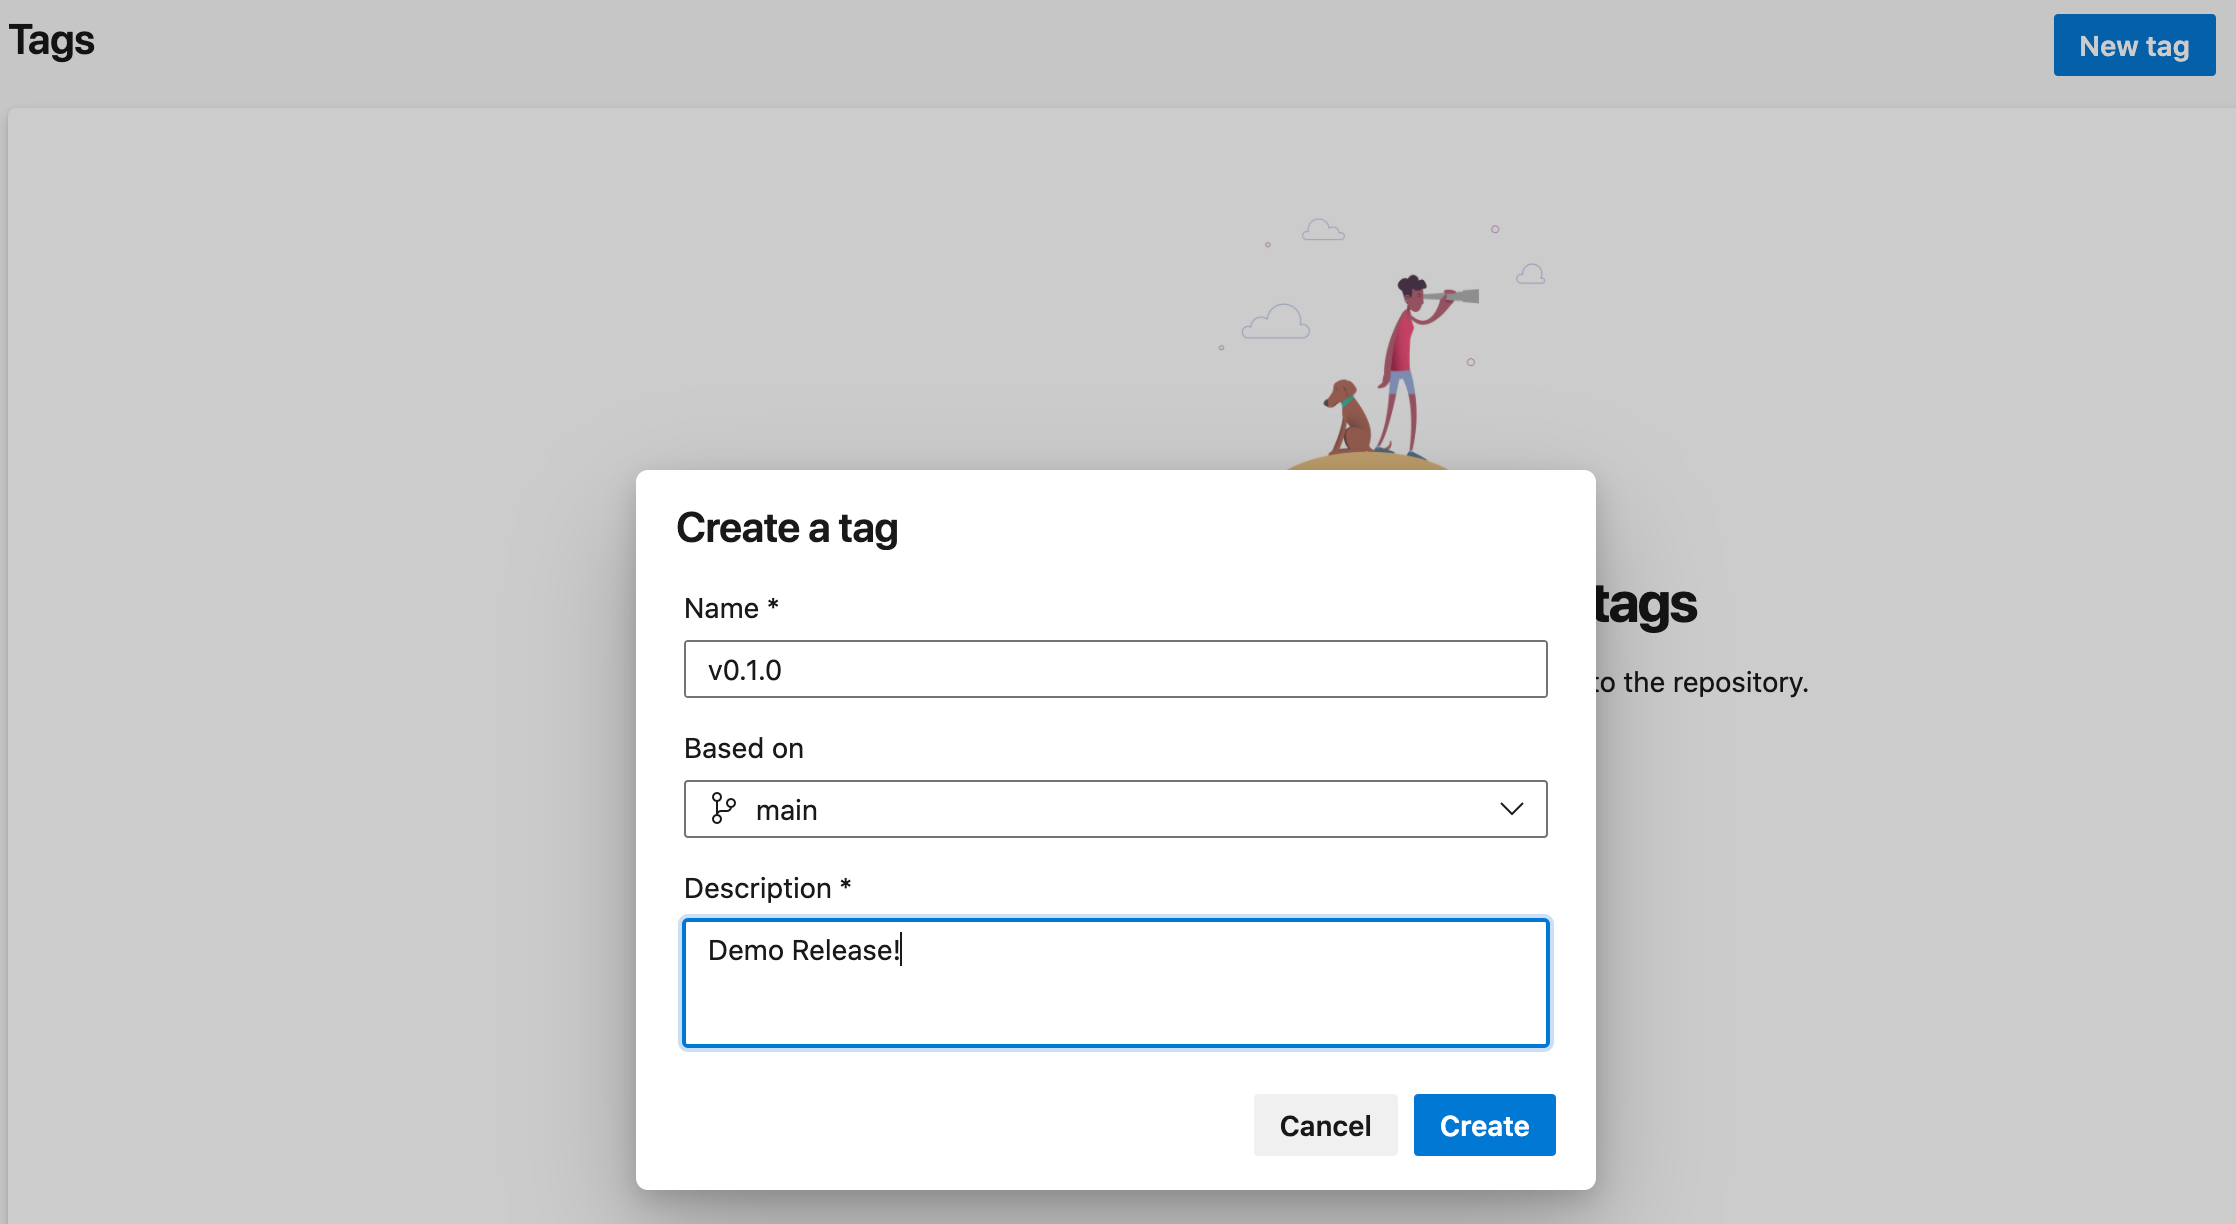
Release the kraken äh app!
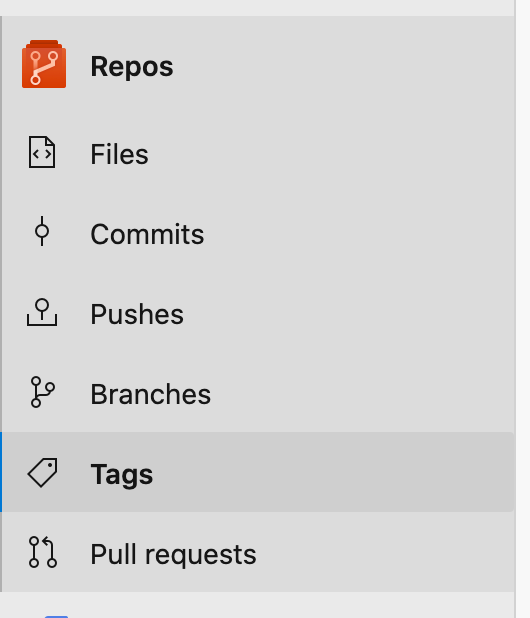
Head over to tags menu and create a new tag in the UI
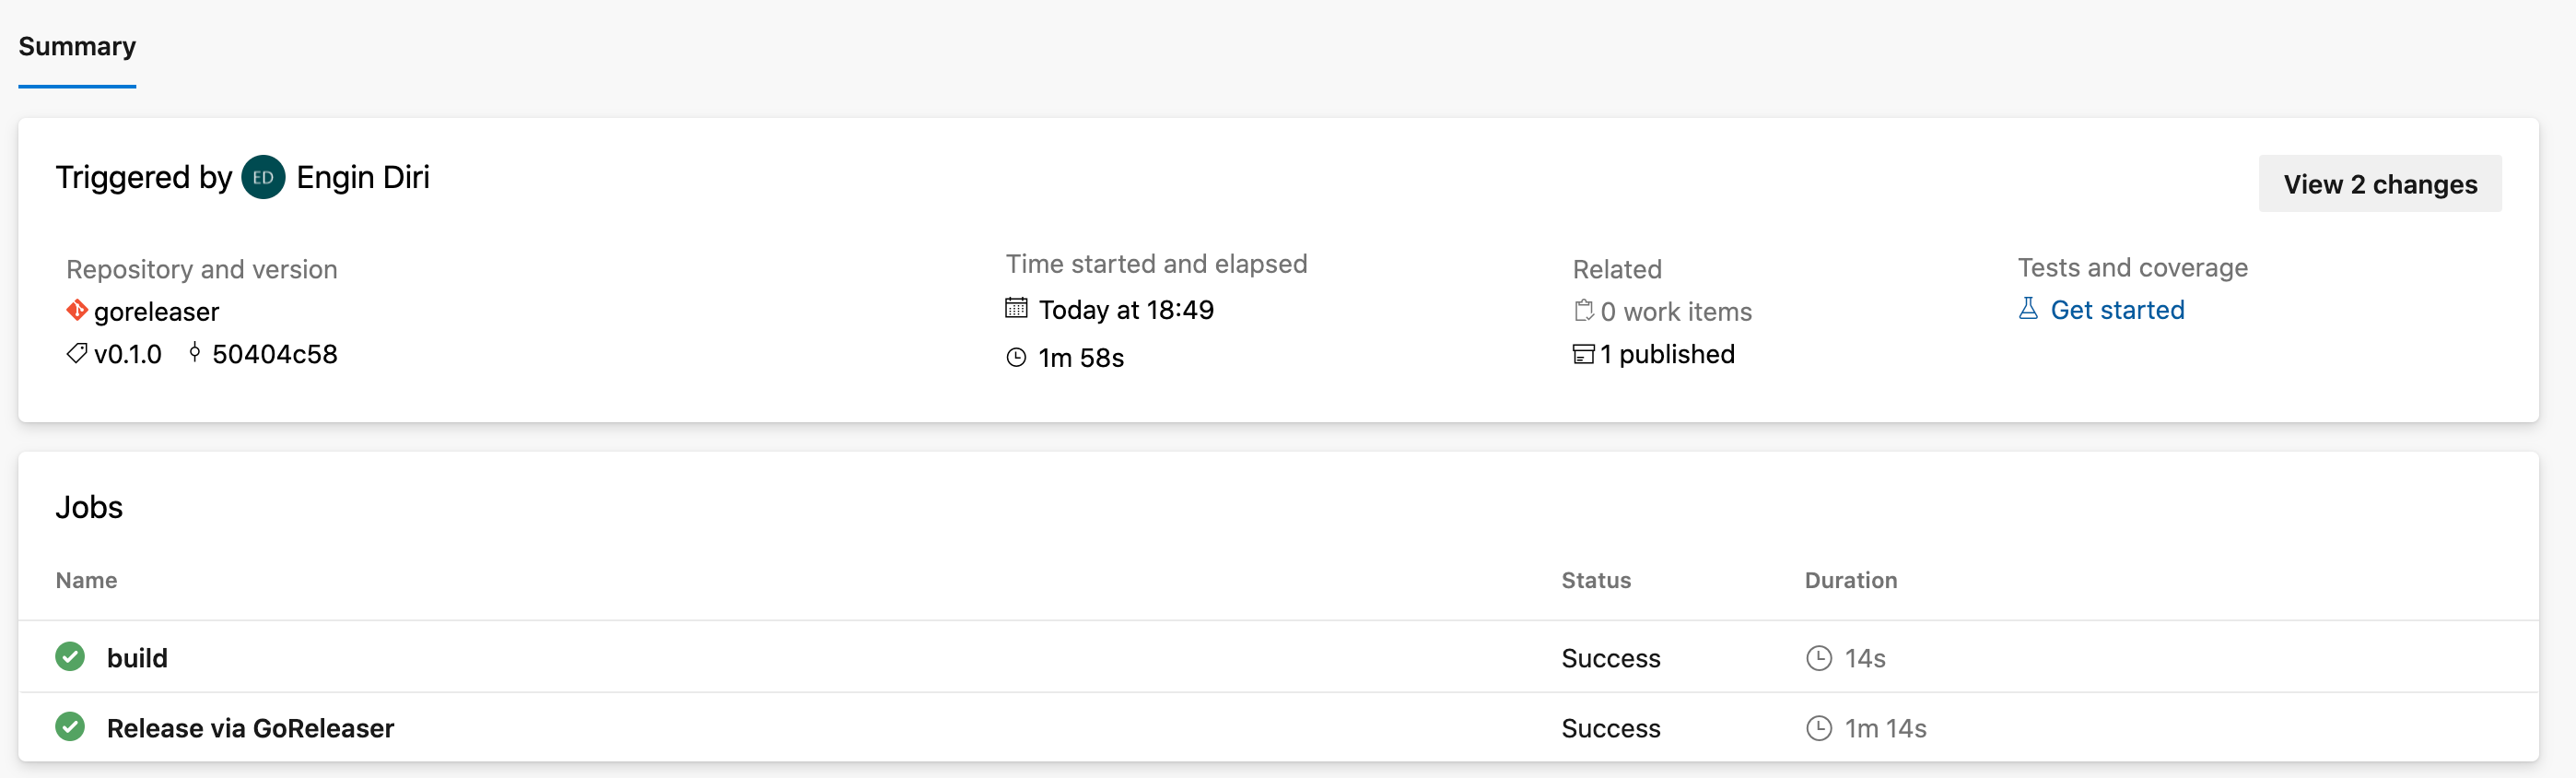
Your pipeline should immediately start to run:

And both jobs should run:

And this is pretty much all of it! As I promised, very easy and straight forward we can implement GoReleaser in Azure DevOps, similar we would use it in GitHub

Caveat:
- I use in cosign not the keyless approach, as I am not sure that it will work for Azure DevOps. So I generated a keypair and committed the public and private key into the repository.